Changing the Order of the Left Nav Menu
The order of the Left Nav Menu can be adjusted by changing the Order Number for the relevant Page-bearing Folders under their Parent Folder's Contents List.
The Order Number for an asset is originally assigned upon creation of the asset, and it relates only to how many other child items may exist within the same parent folder at any given time.
For Page-bearing Folders, the Order Number determines where in a Left Nav Menu's set of links that particular item's page link will be rendered. Only the relative rank matters, not the literal values. The smaller the Order Number, the higher up that item will fall within its section.
 In the following How-to example, we will be changing the order of the items falling
under Sample Page One in the Left Nav Menu.
In the following How-to example, we will be changing the order of the items falling
under Sample Page One in the Left Nav Menu.
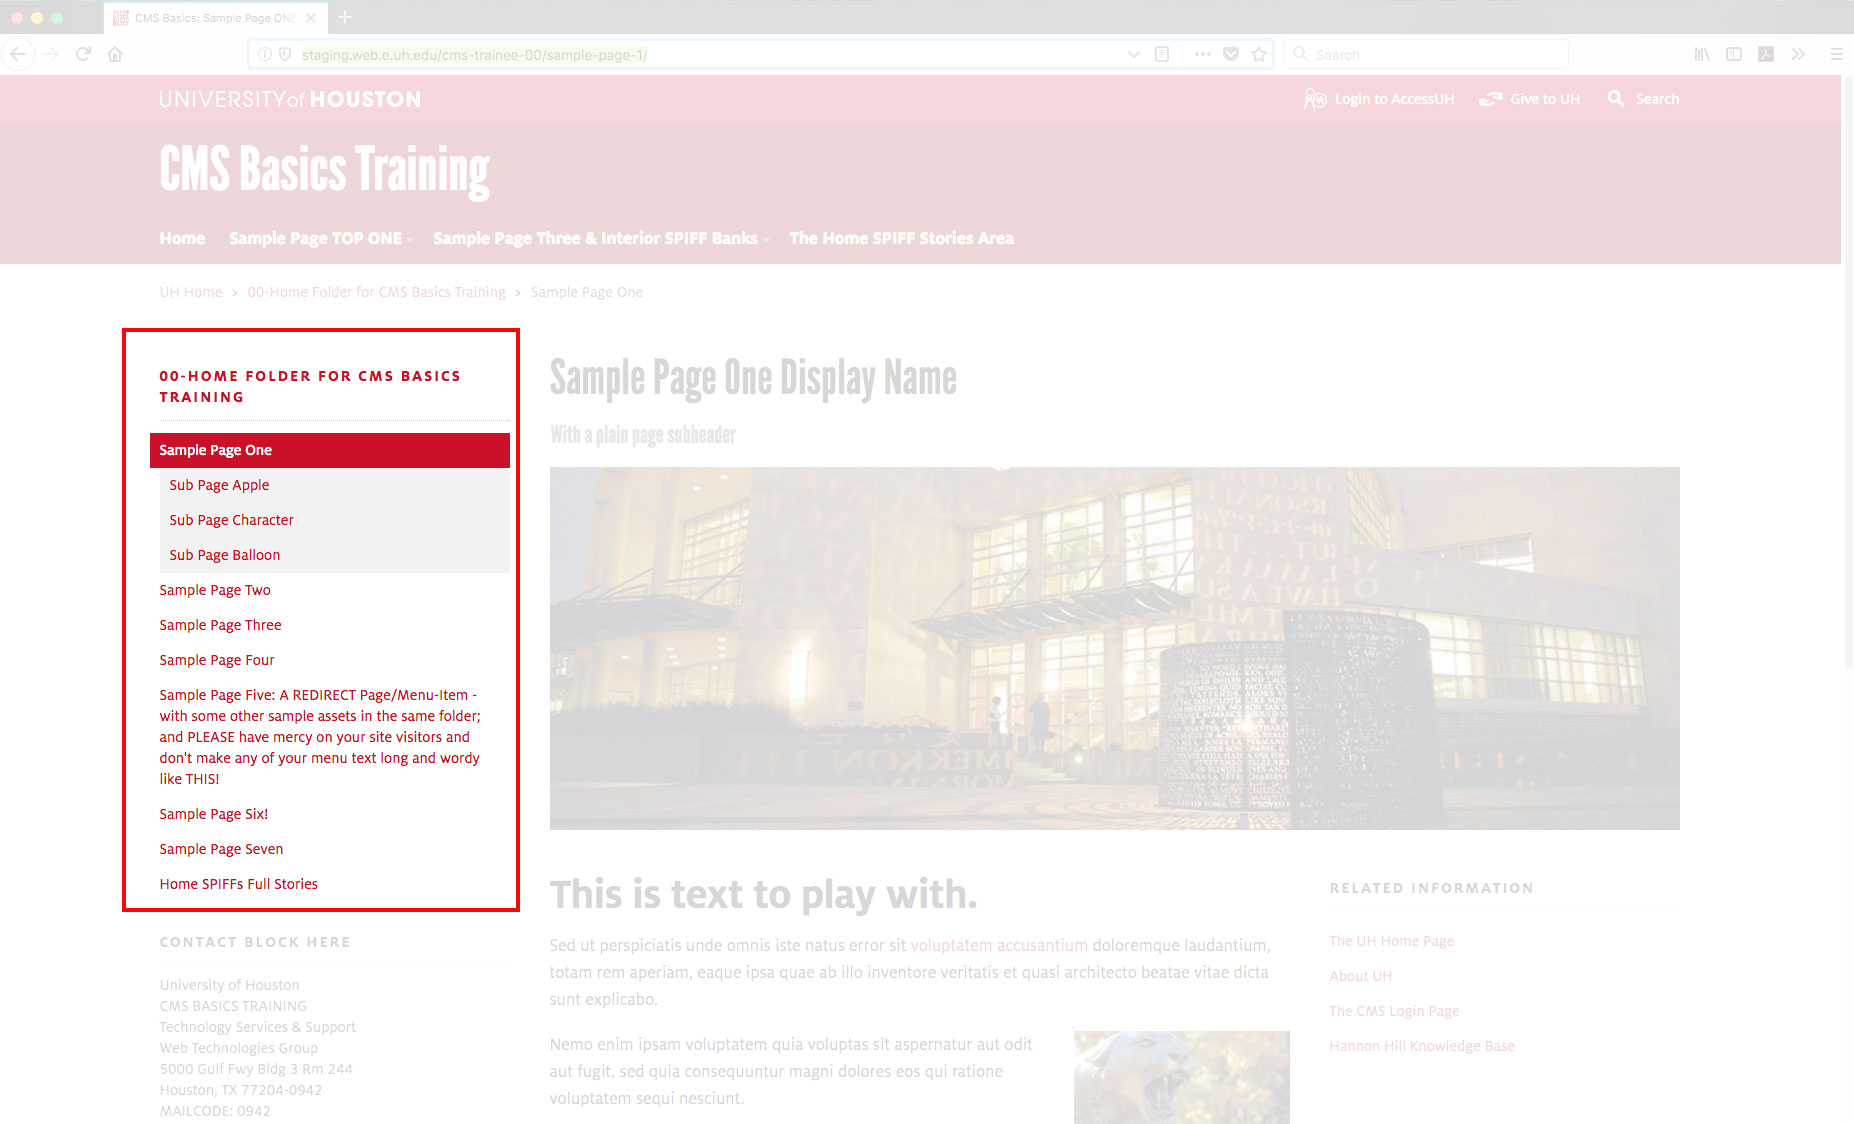
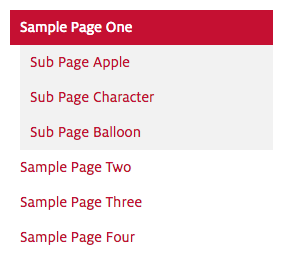
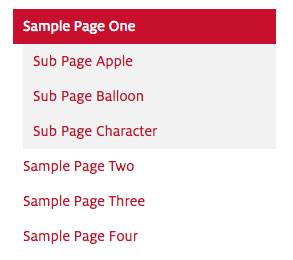
The initial order reads as:
- Apple
- Character
- Balloon
We will be moving "Character" from the second position to the third position. For
the purposes of this How-to, User Settings have Title View de-selected, so that System
Names are showing in the interface. Process is the same regardless of View preference.
See also: information about switching User Settings, Title Metadata View vs System Name View.
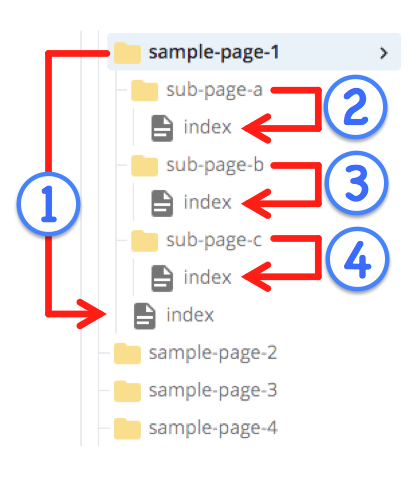
Keep in mind that, in this example, four pages are represented and all four will all be affected by the change in the Left Nav Menu, as each and every one of the pages shares the same set of links (so site visitors can navigate in and around the section easily).
How to change the order of the Left Navigation Menu
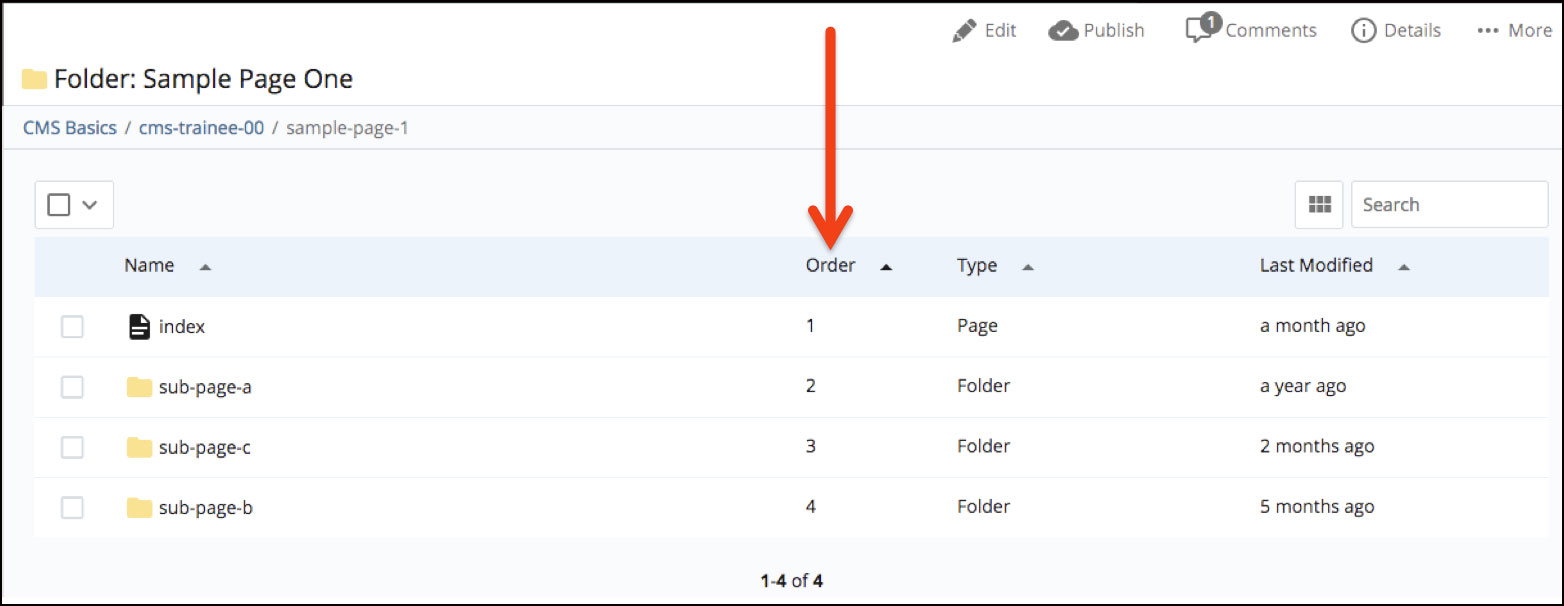
- ) Open your site in Cascade and Select the relevant Parent Folder. Here, the Sample Page One Folder is the selected asset, and its Folder Contents List is displayed below the Title and System Path information in the upper left corner of the general preview panel to the right of the asset tree.
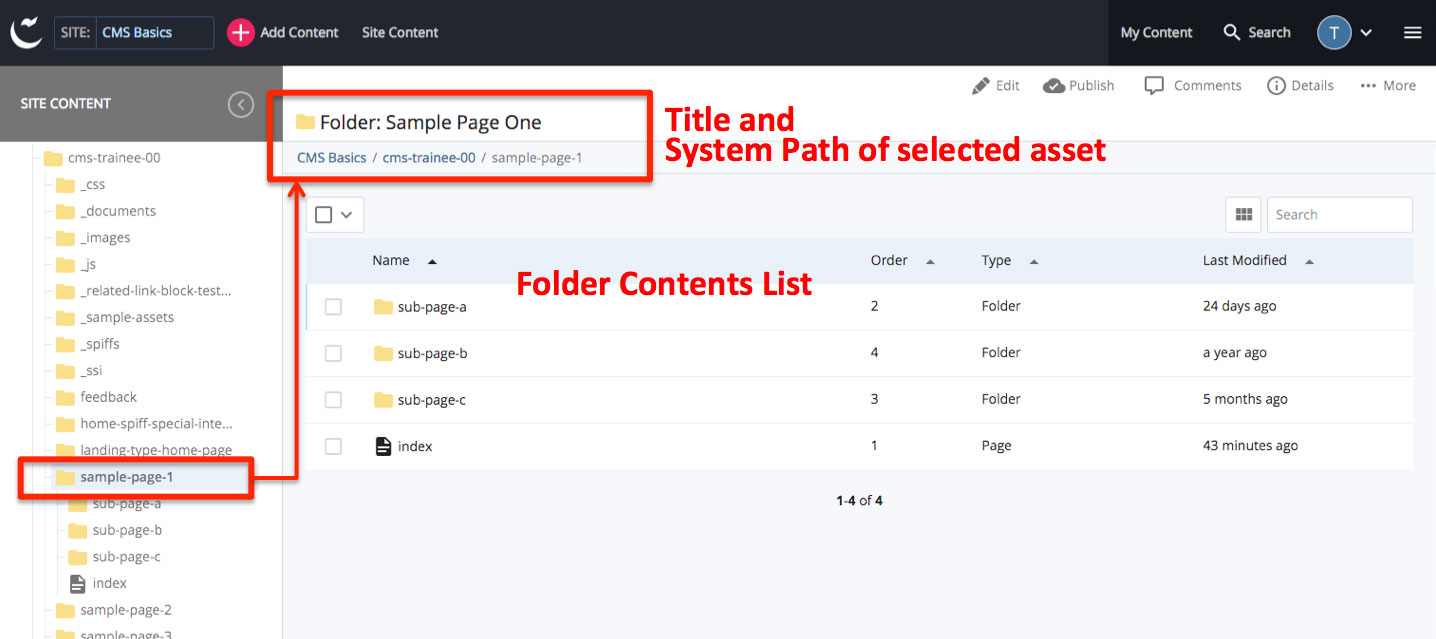
- ) With the desired Folder selected, click on the Order column header from the Folder's Contents List display. The items will now show in a numerical order instead of an alphabetical order. Click
again to toggle ascending or descending Order Numbers if desired.
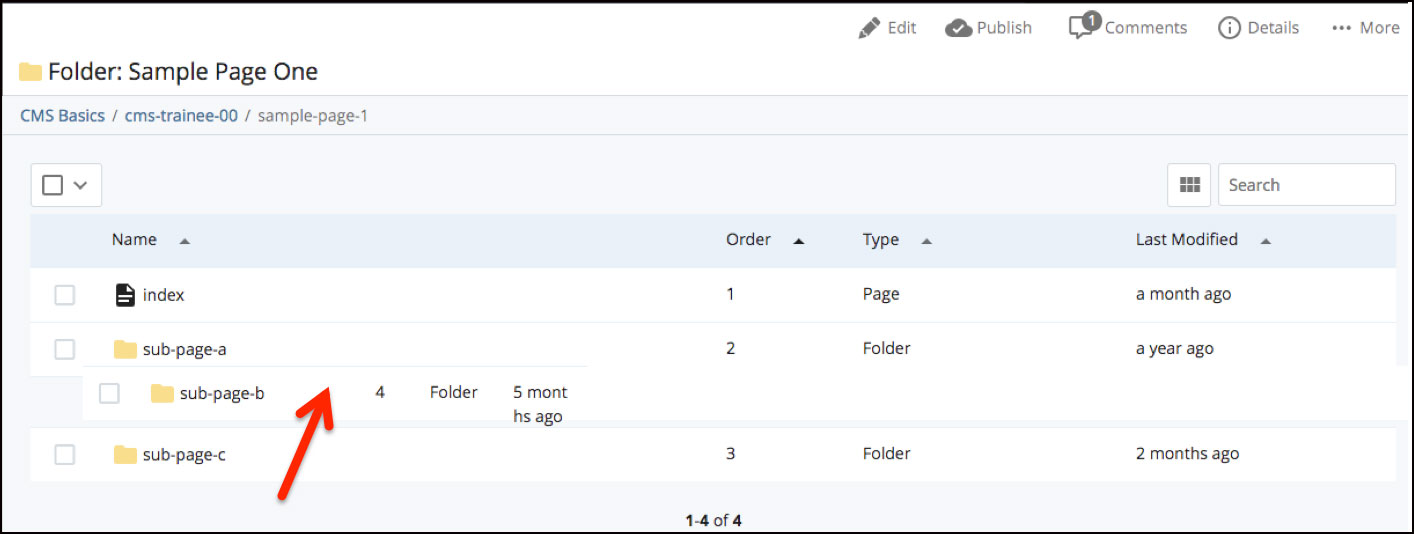
- ) Click and Drag any item(s) you wish to place into a new position. In the illustration below, item 'sub-page-b' is being dragged and will be dropped
above 'sub-page-c'.
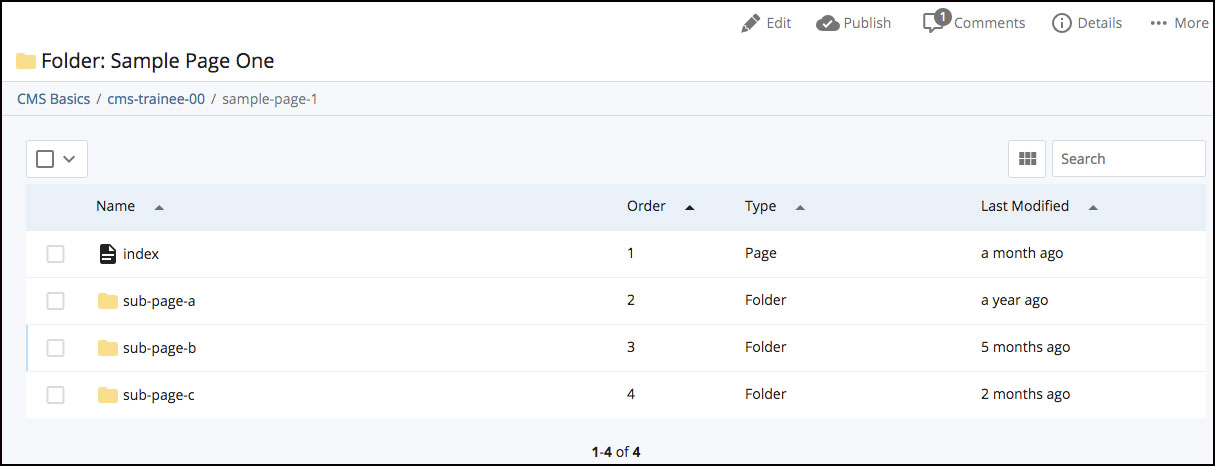
- ) The new Order is recognized immediately and dynamically, without any save, confirm, or draft step.
Alternately, as illustrated following, you may click the checkbox next to an item, and the multi-select options become available. With a single item checked, the re-order arrows can also be used to change the Order Number.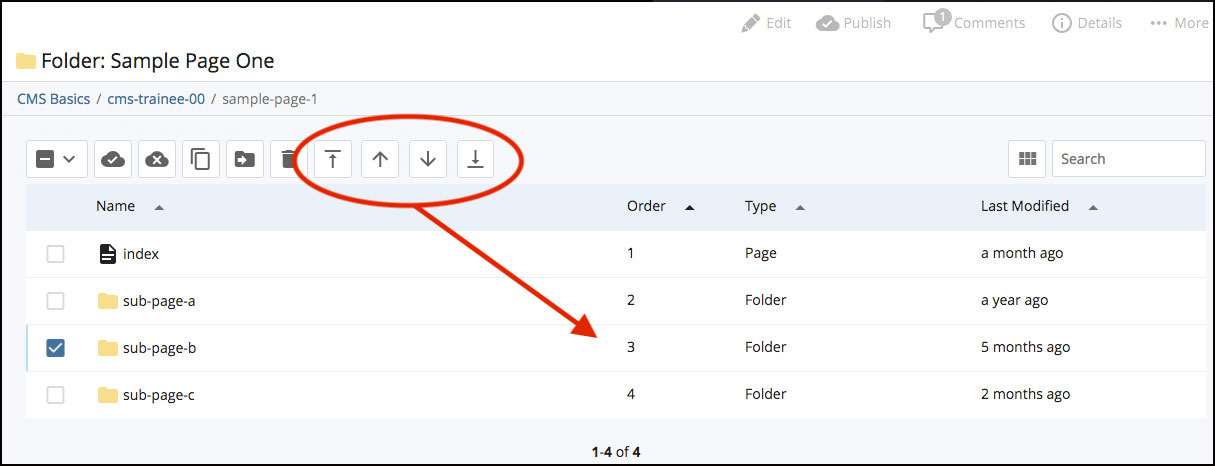
Based on change(s) here in the Folder Contents List view, the Left Nav Menus will also be instantly, dynamically updated for each and every relevant Page in the area (i.e. the main page for the area, and any immediate-child Page-bearing Folder items which are set to Display in Menu).
Please note that in this example, four pages have been affected (the "Sample Page One" Folder's partner page and its three immediate-child Page-bearing Folders). See further comments following in Step 5.
- ) Check the page preview(s) for the pages within this area to ensure the new order is what you intended. In this
example, we now see the Sub Page Character item in the third position instead of its
original second position. Remember, this change would be immediately and dynamically
reflected in the Left Nav Menus rendered into each and every one of all four of the pages represented in this example: Sub Page One itself, and each of its three
child pages.
Note: if any of the selected folder's child items had also had their own child items, all descendant items would reflect the change as well. For example, if sub-page-c itself had sub-pages, each of those sub-pages would also reflect the left nav update, bringing the count of changed pages in this example up to at least nine: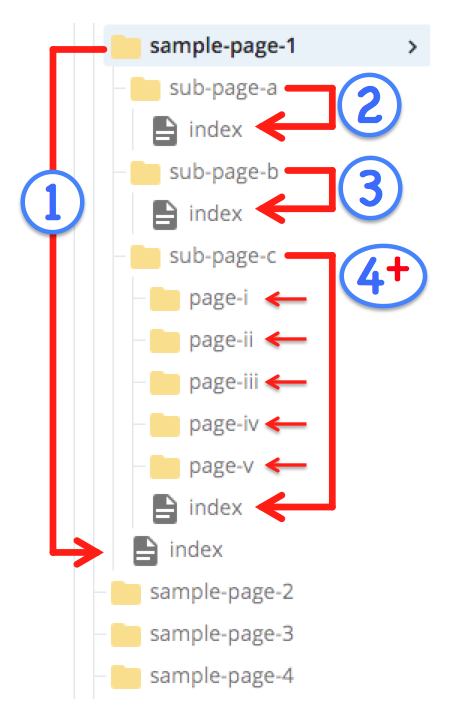
By contrast, any left-nav change within the Sample Page One area would not be "seen" within any of its peer areas' left nav menus (i.e. would not show up on any of the pages within the Sample Page Two area, Sample-Page Four area, etc); and so, such a change would not trigger the need to synchronize anything outside the Sample Page One area.
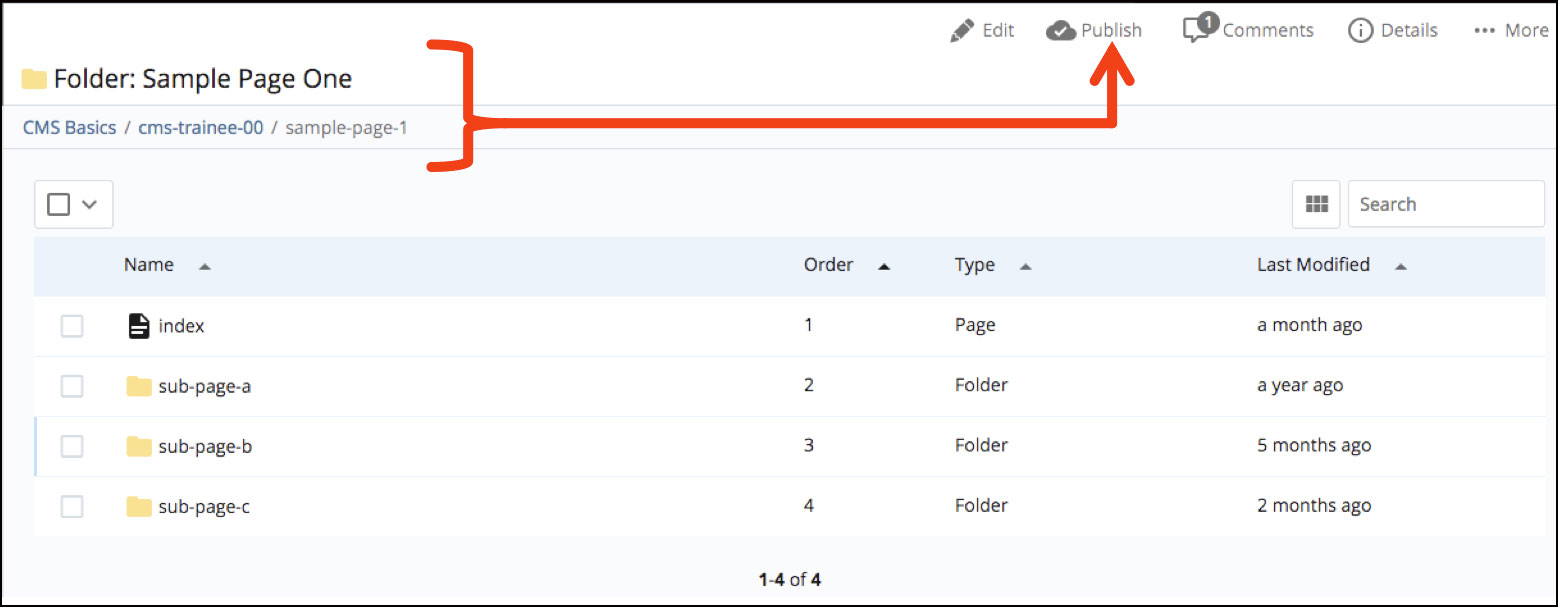
- ) Publish from the selected Parent Folder to Synchronize these changes with any/all of the parallel Static materials on the server.
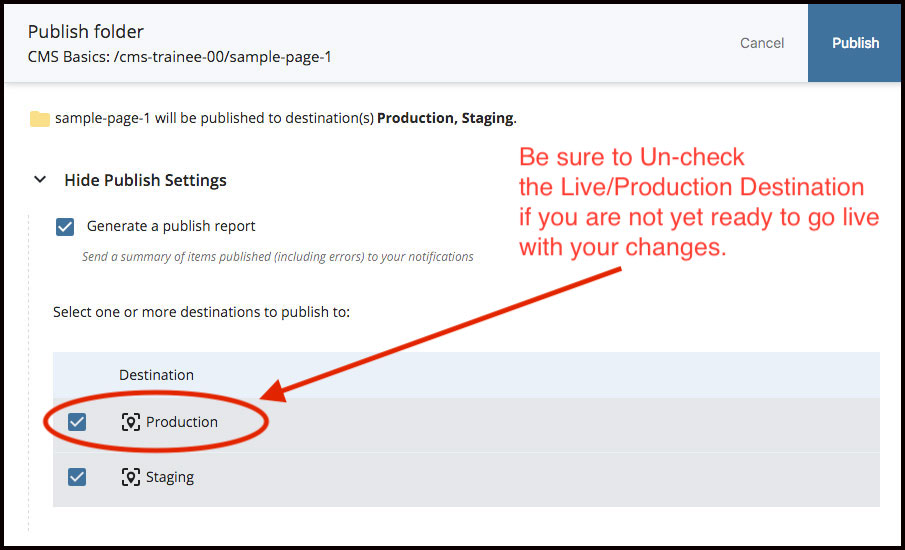
Naturally, be sure to Publish only to the desired, relevant Destinations on the server. For example, be sure to de-select any Live/Production Destination(s) if the changes may still need to be approved before going Live. Shown below, a Publishing dialog with both Production (Live) and Staging (non-crawled) Destinations checked as active. Un-check to de-select and skip publishing to any particular Destination.