How to...
This is a page of instructions on techniques in the style of the new brand using Adobe Illustrator.
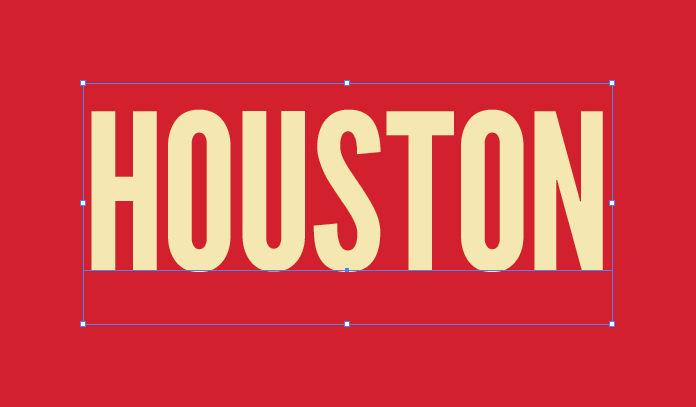
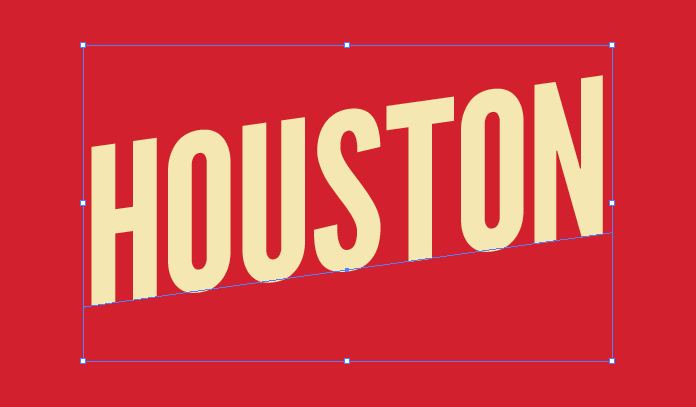
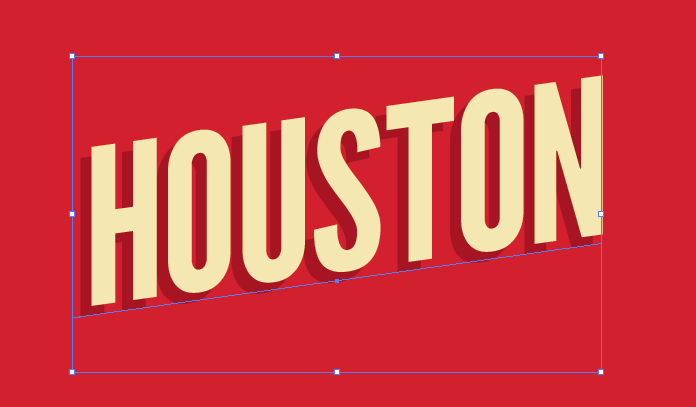
Shear headline type
-
Set your type
From the Character palette choose League Gothic Regular, choose a large point size, and type your headline in all-caps.
-
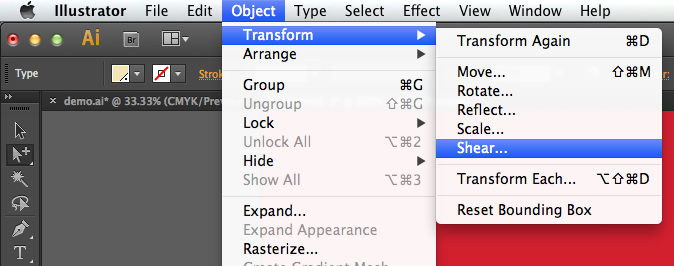
Shear your type
With your type selected, choose from the menu Object > Transform > Shear...
In the Shear dialog box, for Angle type in -8° and for Axis choose Vertical.
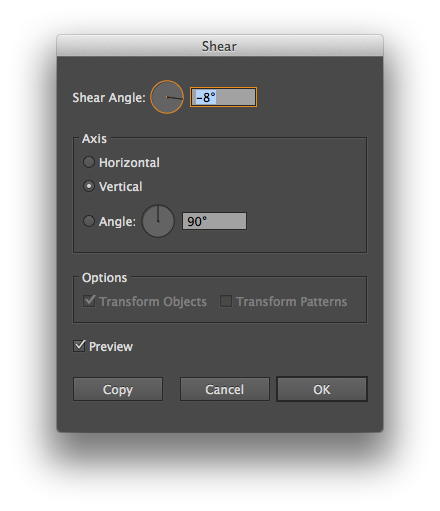
Click the OK button.
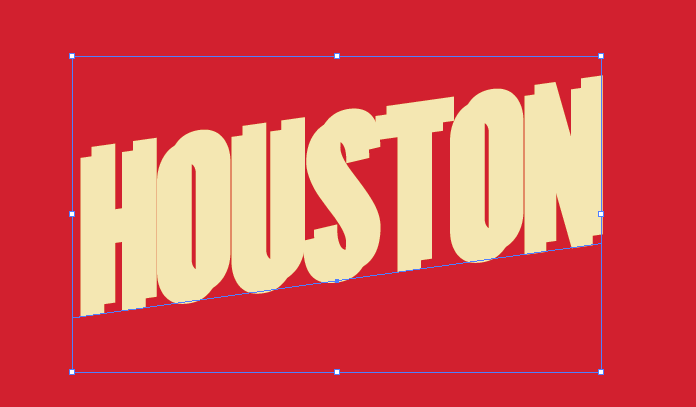
Create a drop-shadow
-
Duplicate your type
Select your type, Copy, and Paste in Back.
-
Calculate your offset
Multiply the point size of your type by 0.05.
Note: The shadow of your type should be posiitioned 0.05 em units left of the type and 0.05 em units below the type. An em is a unit of measurement relative to the size of your type. 1 em is equal to the size of your type in points.
Example: If the size of your type is 72 points, then 72 points × 0.05 = 3.6 points.
-
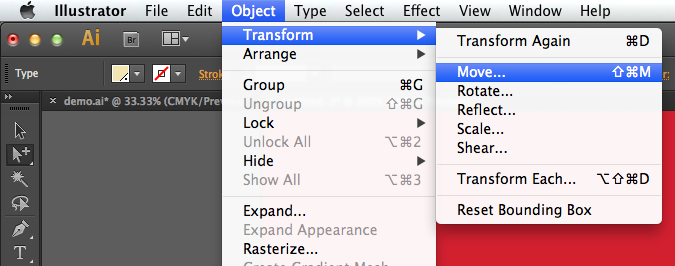
Move your type
With your type selected, choose from the menu Object > Transform > Move...
In the Move dialog box, for Horizontal type in your offset as a negative number and for Vertical type in your offset as a positive number.
Example: If your calculated offset is 3.6 points, for Horizontal type in -3.6 pt and for Vertical type in 3.6 pt.
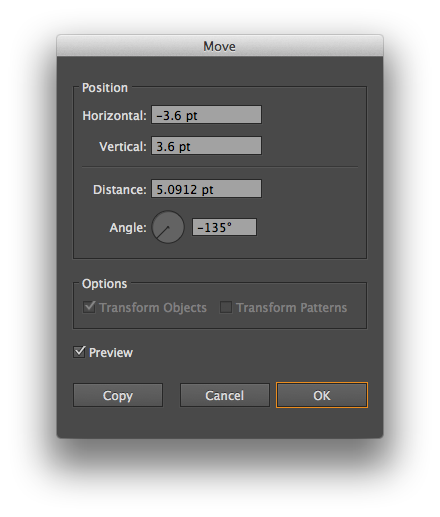
Click the OK button.
-
Color your shadow
With the background type selected, from the Color or Swatches palette, choose Black as your fill color.
From the Transparency palette, choose Multiply as your Blending Mode and set the Opacity to 25%.

Note: If more contrast is desired, choose an opacity up to 50%.
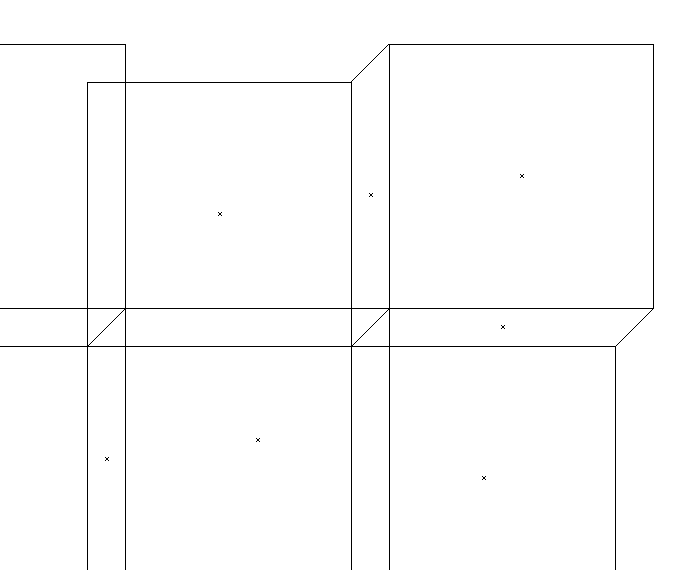
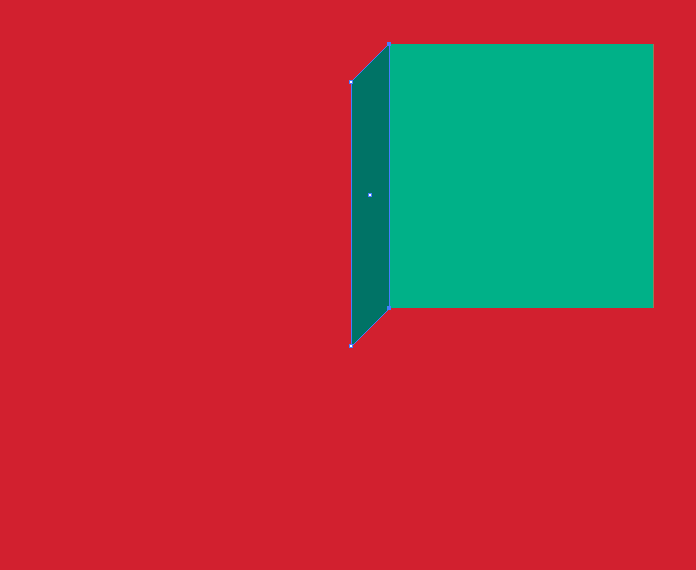
Draw 3D boxes
-
Draw a square
From the Tools palette, choose the Rectangle Tool hold down the shift on your keyboard, and draw a square.

Tip: Choose the color of your box on this step. For example, the "primary teal" PMS 339 C.
-
Make a left side
With your square selected, Copy and Paste in Front.
Tip: Give your new square a darker color. For example, the "secondary teal" PMS 328 C.
With the Selection Tool, hold down shift on your keyboard, and drag the square diagonally to the bottom-left of the original square. Then de-select your square.
From the Tools palette, choose the Direct Selection tool then select only the top-right and bottom-right anchors of the square in front. Then drag the anchors so that they overlap with the top-left and bottom-left anchors of the original square.
-
Make a bottom side
Select the original square, then Copy, Paste in Front, and Deselect your square.
Tip: give your new square an even darker color. For example, the "tertiary teal" PMS 3305 C.
From the Tools palette, choose the Direct Selection tool then select only the top-left and top-right anchors of the square in front. Then drag the anchors so that the left anchor overlaps with the bottom-left anchor of your box.

-
Draw a background box
Select the original square, then Copy and Paste in Front.
Drag the new square so that the bottom-right anchor overlaps with the bottom-left anchor of your box.
With the new box selected, Copy and Paste in Front.
From the Color or Swatches palette, choose Black as your fill color.
From the Transparency palette, choose Multiply as your Blending Mode and set the Opacity to 5%.
Note: If more contrast is desired, choose an opacity up to 15%.

-
Duplicate the boxes
Select all of your shapes and Group them together, then Copy and Paste in Front.
Holding down shift on your keyboard, drag the new group to the left so that the bottom-most-right anchor overlaps with the bottom-left anchor of the original group.
Repeat as many times to the left and to the bottom as you want. You may need to re-arrange your groups on the Layers palette to make sure no background squares appear in front of your 3D boxes.

From the menu choose View > Outline to make sure all of your objects line up precisely to prevent any gaps from appearing.